Facebook Pixel – What is it and why you should use it.
This post is also available in:
![]()
![]()
![]()
If you never have, and never will contemplate using Facebook Ads as part of your marketing strategy, Facebook Pixel has probably passed you by. But what if you do want to use Facebook Ads?
One of the reasons that people don’t use Facebook ads is that there is little return on investment, without a pinpoint targeted audience. But how do you know your precise audience, without breaking down the information you receive from every paying customer? You probably know who your broad target markets are, but that isn’t enough to dig down to the specific people who want your service or product. Facebook Pixel uses your buying customers to create a target audience for your advertisements on Facebook. It sounds a bit too convenient, but its an exciting way to target your “most-likely-to-buy” on their browse through the Facebook world.
What is the Pixel Code?
The Facebook Pixel is an analytical tool in the form of code that you put on every page of your website. This code is triggered every time a visitor takes action on your website, expressly when they are signed into Facebook at the same time. The Facebook Pixel tracks when users respond to a Facebook ad, what actions they take on your site, the pages they visit and the length of time they spend there. All of this information, in addition to the Facebook user information already available, gives the audience targeting algorithm a significant amount of data about the people interested in your service or product.
What Does Facebook Pixel do?
There are four functions that the Pixel code performs:
1.Measures conversions
2.Creates custom audiences
3.Optimises ad targeting
4.Website visitor insights
Before 2015, you would have needed to use a separate Pixel to do each of the different functions. However, to make using the Pixel tool more straightforward, in 2015 they released the single Pixel, and in 2017 retired all of the others. Adding so much code to the header of every page on your website was bulky and redundant.
Facebook Pixel and Facebook Ads
To use Facebook advertising to your greatest advantage, you need to use the Facebook Pixel. It is best to install the Pixel code on your website before spending any funds on your Facebook marketing campaign.
You will need an advertising account for Facebook to get the Pixel code. However, you don’t need to have created campaigns or spent any money before inputting the code onto your website.
Pixel and SimplyBook.me
There are two things that Facebook says you need before using Facebook Pixel
- A company website
- The ability to update the website code
Thanks to the Custom CSS feature in the SimplyBook.me software, you can use your booking site as your company website and alter the page code.
If you haven’t already created a Facebook Pixel, here are some precise instructions on how to do so, from Facebook.
- Go to the events manager on Facebook
- Select the first option and click the right-hand “Get Started” Button.
- Give the Pixel a name (probably your business name)
- Insert your SimplyBook.me website URL in the field below.
- Choose to install the Pixel manually.
![]()
6. At this point, the instructions will tell you to find the <header> section on your website pages and to copy and paste the whole segment below into your headers for every page. You can’t do this on the Custom CSS editor.
- You only need the highlighted yellow section, after “src”. Copy this.
![]()
7. Open your dashboard for your SimplyBook.me booking site and go to Custom Features – Custom CSS – Settings. This is where you will put your little bit of pixel code to track your bookings.
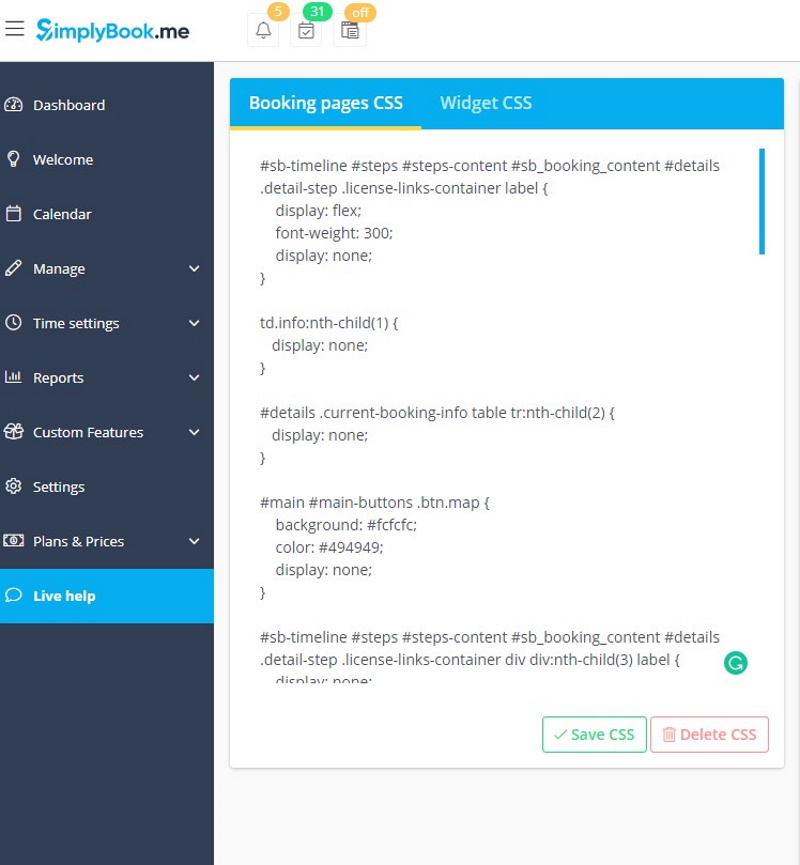
The following are some examples of different tracking templates for the Custom CSS pages. You will need to replace the bold sections with the yellow highlighted text from your pixel code (above).
- General booking tracking
#booking-result-view .booking-item.booking-confirmed { background-image: url
(" https://www.facebook.com/tr?id=663779800774311&ev=PageView&noscript=1 "); }
- Invoice payment tracking (if you don’t allow the customer to book without paying)
.invoice-pay-page .invoice-info .part table b.text-success{ background-image:
url(" https://www.facebook.com/tr?id=663779800774311&ev=PageView&noscript=1 "); }
8. When you have input your required tracking code, this is approximately how it will look.
![]()
WARNING: Changes made here do NOT automatically save so make sure to click the “Save CSS” button at the bottom.
9. After copying the code to the SimplyBook.me Custom CSS Editor settings, go back to the Facebook pixel settings page, click
“Continue” → “Manually install event code.”
10. You will be presented with a list of events that you may want to track.
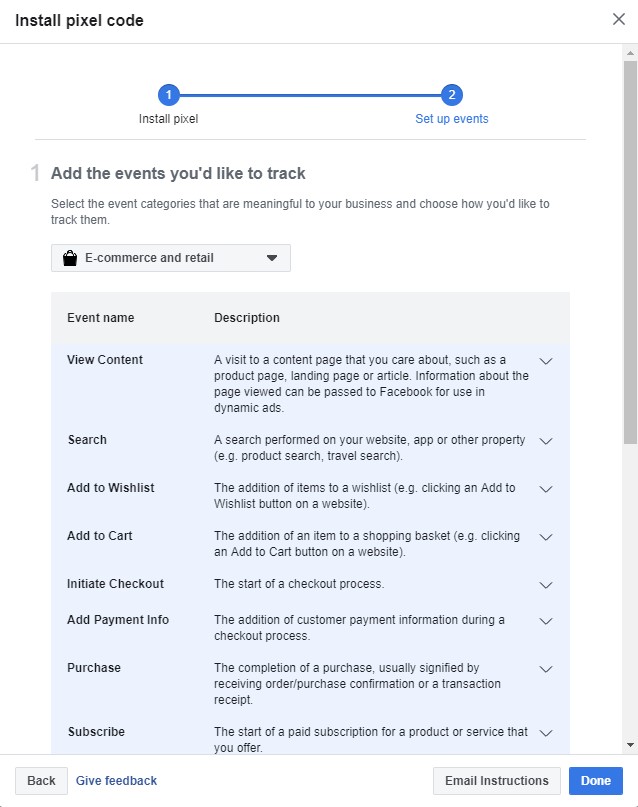
Choose the events you wish to track and enter the required information.
The example below is for scheduling
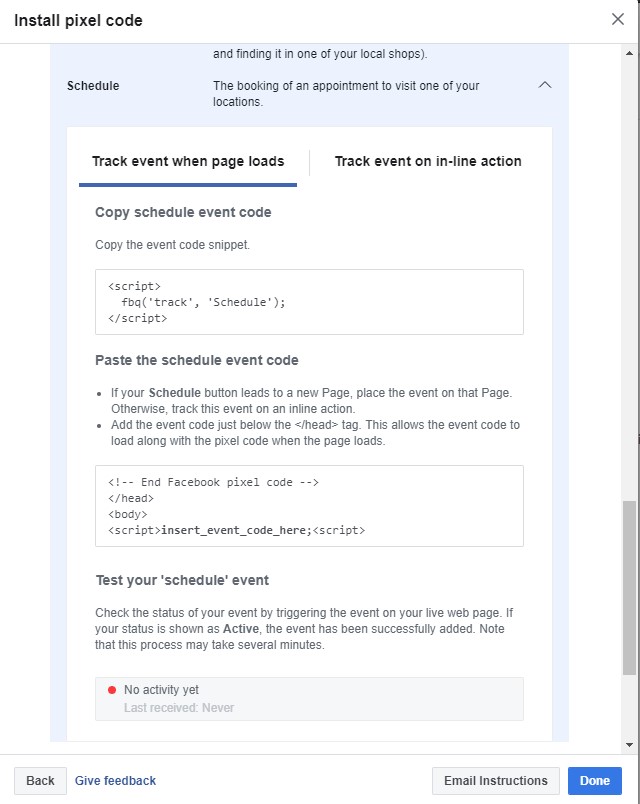
Press Done.
11. At this point, if you scroll to the bottom of the track events window, you will be allowed to test your tracking. It’s a good idea to test that everything is working.
N.B. If you use Chrome, the Facebook Pixel Helper plugin can be extremely useful to understand where things are possibly going wrong.
12. Finally, you can view the successful appointment of the tracking you just set in the Facebook pixel list!
Comments
2 comments