Custom Email Designs for Your Business Messaging with SimplyBook.me

This post is also available in:
![]()
![]()
![]()
You know you can send bulk emails to your client lists, and you know you can send reminders, review requests and “book soon” notifications. However, what you really want is the ability to send professional, attractive and engaging mail campaigns without having to do it through an external ESP (that’s an email service provider – no psychics involved). It’s been a long time coming, but now you can build beautiful, professional and custom email designs for your SimplyBook.me client list from within your dashboard. Moreover, it’s a drag & drop format that everyone loves because it’s so simple. Play with the layout, add and remove features, play with the themes, colours and fonts for the best-looking and company-aligned messaging.
Let see what it can do!
Getting Started With a Template
You don’t have to create a new email from scratch to get started. You can try your hand at adjusting the templates with the help of one of our pre-built designs. Then you can move on to creating custom email designs with the editor. We wouldn’t just leave you hanging without a starting point.
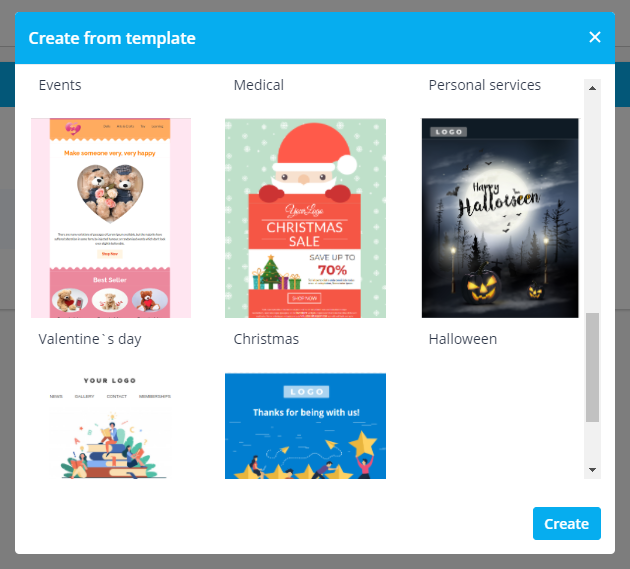
So far, we have fourteen different templates with a rough approximation of the industry and the occasion they might fit best. No judgement here. If the Sports & Fitness template is closer to what you want for your beauty emails, then so be it – it’s all subjective.
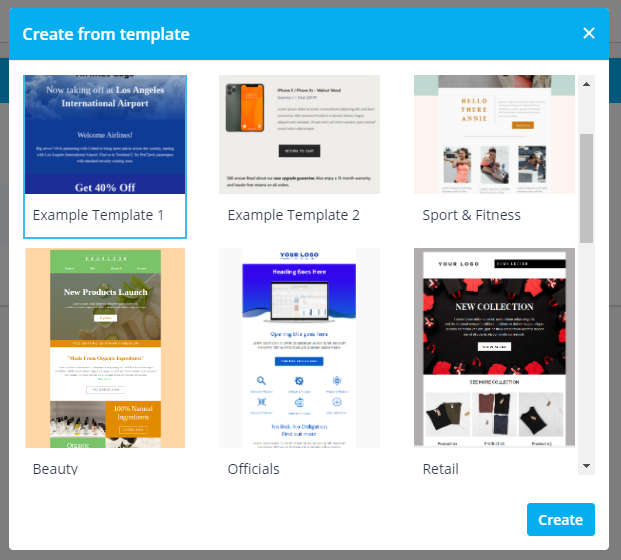
However, you can imagine our reasoning behind the hearts and flowers for Valentines, the green and red Santa theme for Christmas, and the dark and spooky Halloween theme, which you could also repurpose for Black Friday if you wanted.
Adjusting the Templates
If you want to adapt a template to your needs, it’s simple. Enable the Custom Email feature (either in the Custom Features menu or in the Marketing Suite) and click on Create from Templates.
Scroll down the popup list of templates available, and select the one that best reflects what you want to send to your clients.
I’m going to create a standard email to send to my clients for a review request after their appointment. First, I will need to give my customised template a name, “Review Request” (you don’t adjust a template directly, you create a copy and change it accordingly).

So I’ll use the Feedback template as the basis for my “Review Request”.
The Custom Email Design Opening
The first thing that I want to customise on my email is my logo. Simple task, I’ll drag and drop my logo into the image box. And I’ll also make sure clicking my logo will take my readers directly to my website.
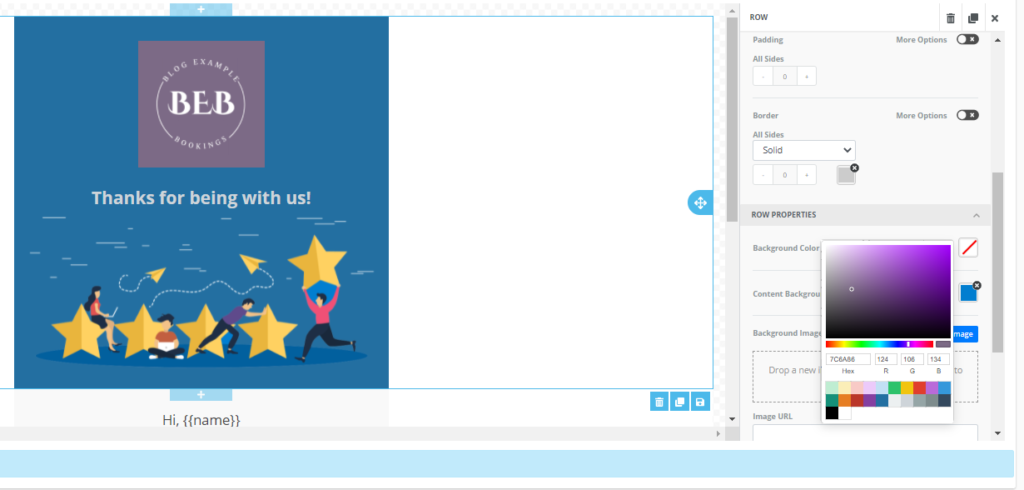
However, if I put my logo on that blue background, let’s be fair, it looks a little silly with my colours. So perhaps I’ll change the background colour.

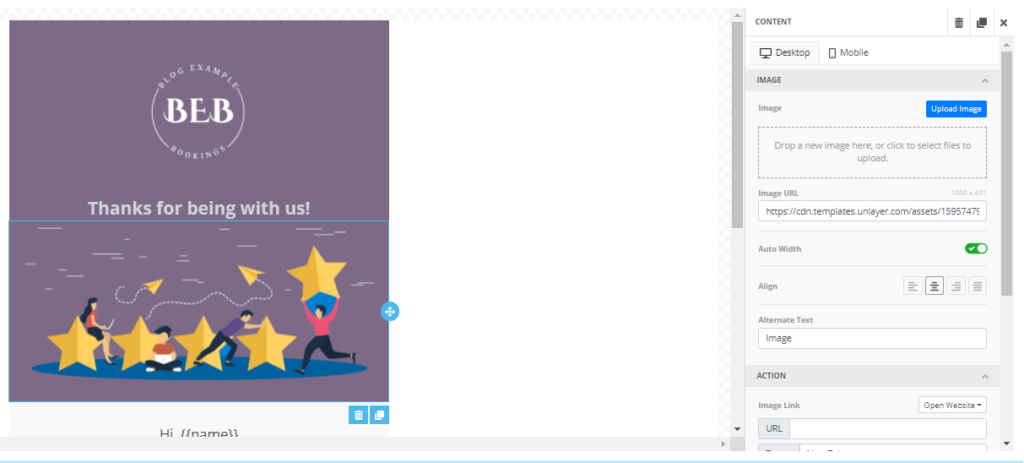
Hmmm, do I like that picture?
I don’t think so, and that little blue bit looks wrong – I think I’ll change the image. It’s straightforward. Click on the image, making sure it’s highlighted in its blue indicator box, and drop a new picture in the toolbar at the side.
Do you want to change the font or the colour of the letters? That’s easy. Click on the text box and use the text editor that pops up.

The End of the Email – assuming they are still reading
For this example, I’m going to skip past the name content tags to the lower half of the email template – don’t worry, I’ll cover content later. This is where you might want to put your standard text blocks – the ones that rarely (if ever) change and your social media links.

So, here the template has a “Review us on Google” Button. Yes, you can add buttons to your custom email designs. However, if you don’t have a Google Business profile, that button is useless. If it’s no use, you can delete the button and the accompanying Google image.
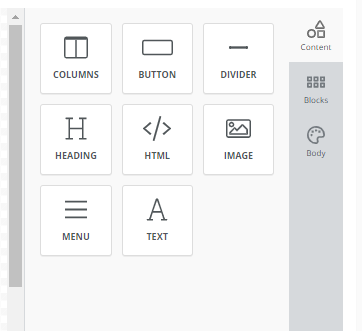
NB If you want to eliminate any blocks on the template design, you can highlight them and click the little trashcan at the top of the toolbar. Ta-da, it’s gone! Be aware that if you delete elements from a template, you can’t undo it!
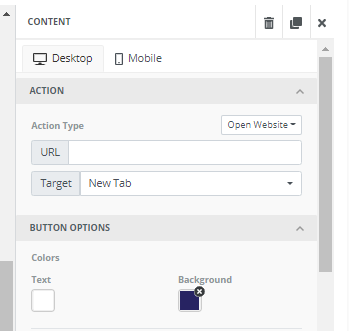
Alternatively, if you have a Google Business profile, you will need to tell the button where to send your reviewers. With the button highlighted, you will see in the toolbar that there is a list of actions.
What do you want the button to do?
You want it to take your client directly to the review options on your Google Business profile in one click. So you want it to open the website, tell it the URL address, and tell it whether to open a new tab or to open in the same tab. Personally, I prefer to open new web pages in a new tab. You can also change the text format and colours on your button to reflect your colour themes.
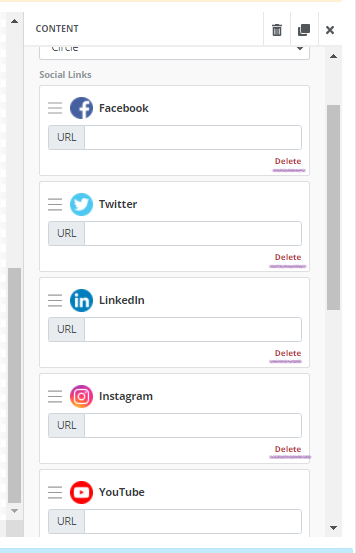
What social media accounts do you have?
If you have the big 5, Facebook, Insta, Twitter, Linked In, and YouTube, then you can leave the icons as they are and complete the URLs for your profile pages.
If you want to get rid of Linked In or YouTube because you don’t use it, that’s fine. There’s a little delete button next to each social media platform.
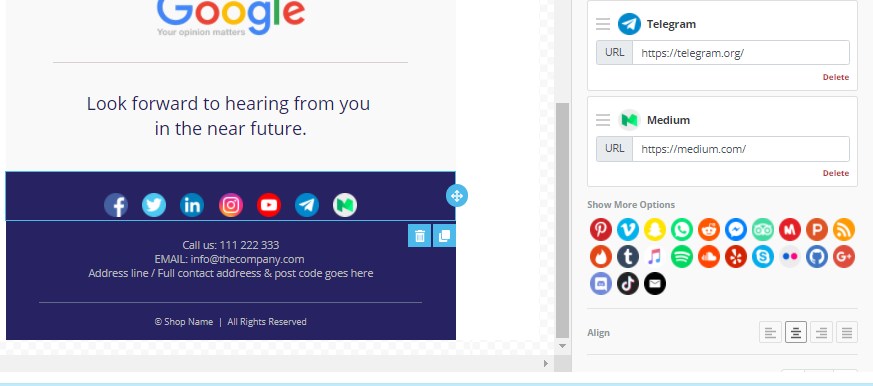
What if you have different platforms in your social repertoire?
I have added Medium and Telegram, but if you have any others, you want to get your clients talking on, add them in and complete your profile URLs. You can add any of the icons you see in the box – we have the most popular ones.
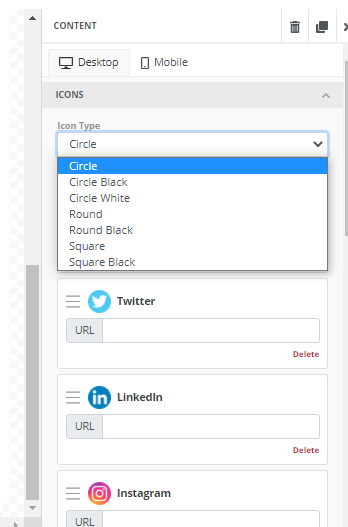
You can also choose how you display your icons, full colour, monochrome – black or white, squares, circles or rounded corners.
What info do I need on my email footer?
As standard, you will want to include a phone number, email address, and a registered physical address. You might also want to add your opening hours – if you feel like it.
The Important Bit – The Content!
This is the whole reason for sending the email! Thankfully, you can populate this part from your existing settings on your dashboard, Settings//Email & SMS settings.

As I’ve been working on a review request email design, I’ll scroll down the list of automated email types to find the one that will send an automatic request for a review after a client has completed their appointment.
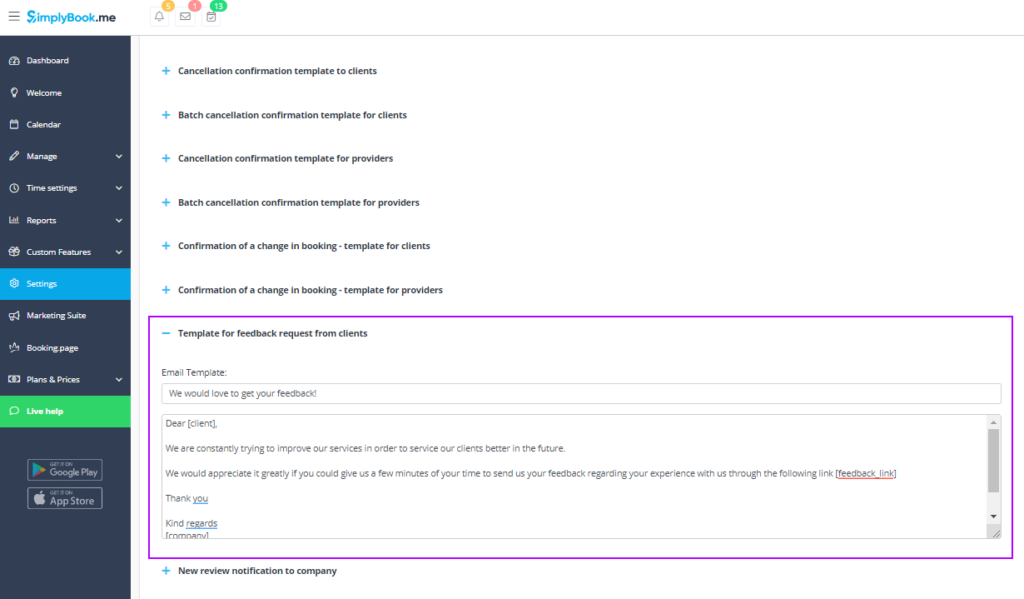
As you can see, this is where you will create the email subject line and the text for your review request emails. You can stick with the default email message already there, or you can write a new one. That’s the whole point of being a customisable system.
When you put the {{content}} tag in a text block from your custom email design, this is what the design will use to populate the space automatically.
One bonus to the predefined templates is that our designers have created them correctly in both desktop and mobile views. So even if you play with the images, colours, fonts, and buttons, the overall design will show perfectly; however your clients access their emails.
Just to make sure, you can toggle between desktop and mobile views in the editor to ensure it looks beautiful in both formats.
Creating A Custom Email Design From Blank
When you’ve gained some confidence and learned how it works, you can try building a completely custom email design. All of our templates were created with the tools available in the template creator – you can create stunning emails that reflect the best of your business with a few clicks.
Everything here is what you need to make gorgeous custom email designs that perfectly fit your business and professionalism.
To create an entirely new template, when you select “create template” from the Custom Email feature, you should choose“create new empty”. You will need to give your new template a name. I’ve gone with “Default Email Template” for the majority of my automated emails.
Assigning Custom Email Designs to Automated Emails
To assign a template to a specific email, you need to navigate to Custom Features//Custom Email//Settings. From here, you can set a template design to the particular emails you designate.
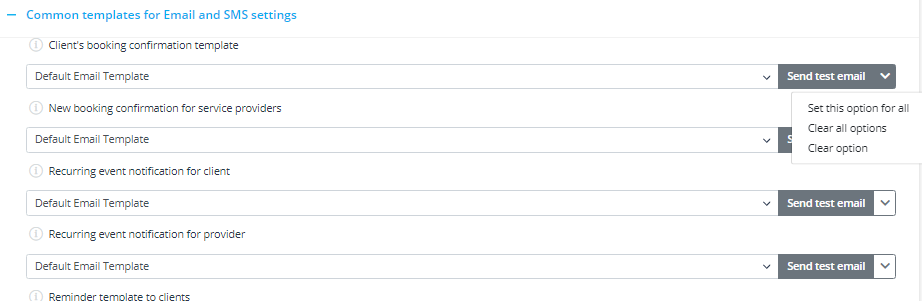
Suppose you extend the Common templates for Email and SMS settings. Then you see a list of all the same automated emails available on the Emails and SMS settings in the dashboard configuration. Each message has two drop-down menus. One indicates the saved custom email design you want to use for that automated email.

The other drop-down lets you set the same custom design for all emails. It also allows you to clear all the automated email settings, or just clear that email setting.
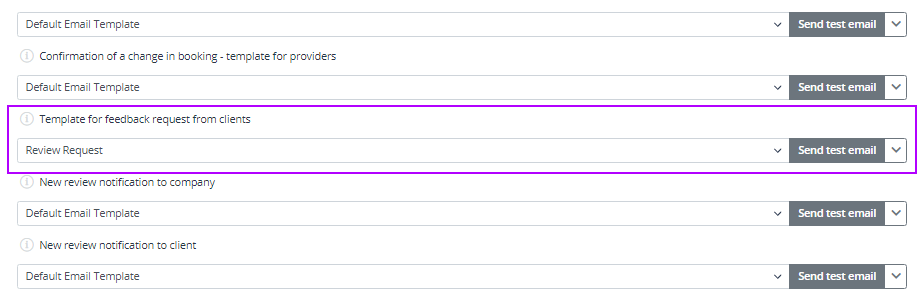
Thankfully, you can set all messages to the same default template. You can alter the individual outliers, for example, the feedback request individually. You can see everything else has the Default Email Template – but the Feedback request has the review request template. I only had to change one
And the best part is, you can test them out beforehand. Just click the “send test email” button, and a test example of the email will in your designated test email address. If there are any mistakes you hadn’t seen in the editor, you can fix them without any client being aware.
Do you want to see my test emails?
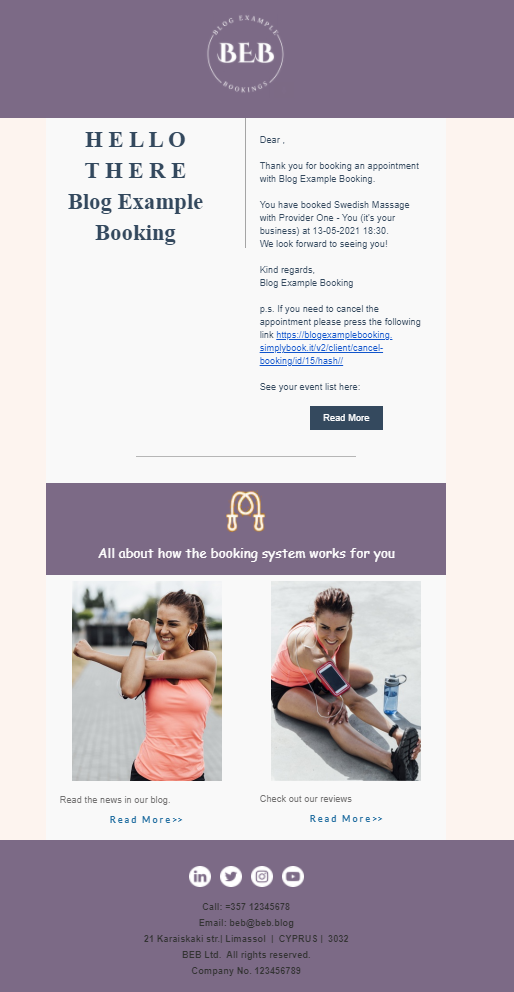
The first email I tested was the Default Email template, and I tested the Client’s Booking Confirmation Email. It is a responsive email that populates the text with specific client and booking information. I thought it would be a good one to try.
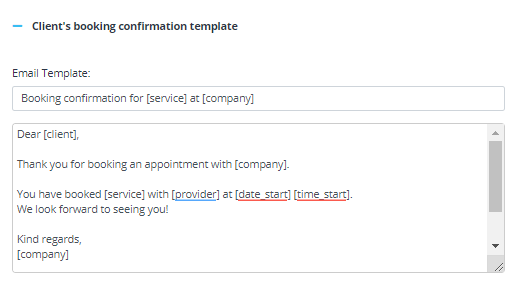
And the resulting test email is …
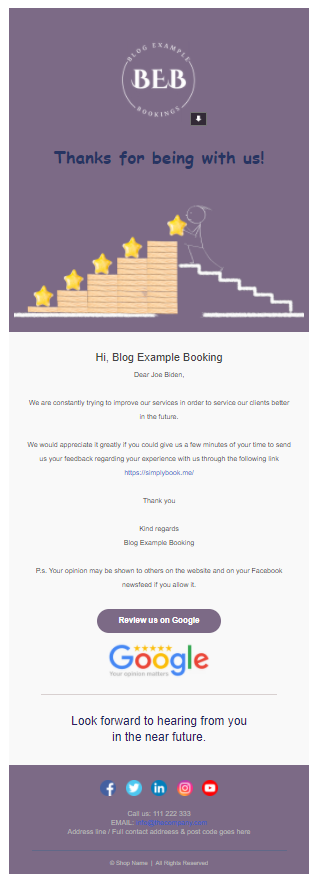
Now for the Review Request

and the resulting test email…
What do you think?
Gorgeous, consistent and customised email templates for all your client communications. It might seem like a daunting task to create templates for all the automated emails your system sends. However, you only need to create a few key custom email designs because you want consistency throughout your client contacts. Once you have the standard bits covered, tweaking individual blocks is simple.
Dive in and have a try. Start simple with the templates, and then really customise your emails to match your business themes. Your clients will love being able to identify your style at a glance.
If you want to talk a walk through the process, you can use our help centre article to help you. If you get stuck, you can always talk to our live chat support – they are excellent and love to help. Check out the video too. There are some stunning examples on there.
Comments
3 comments